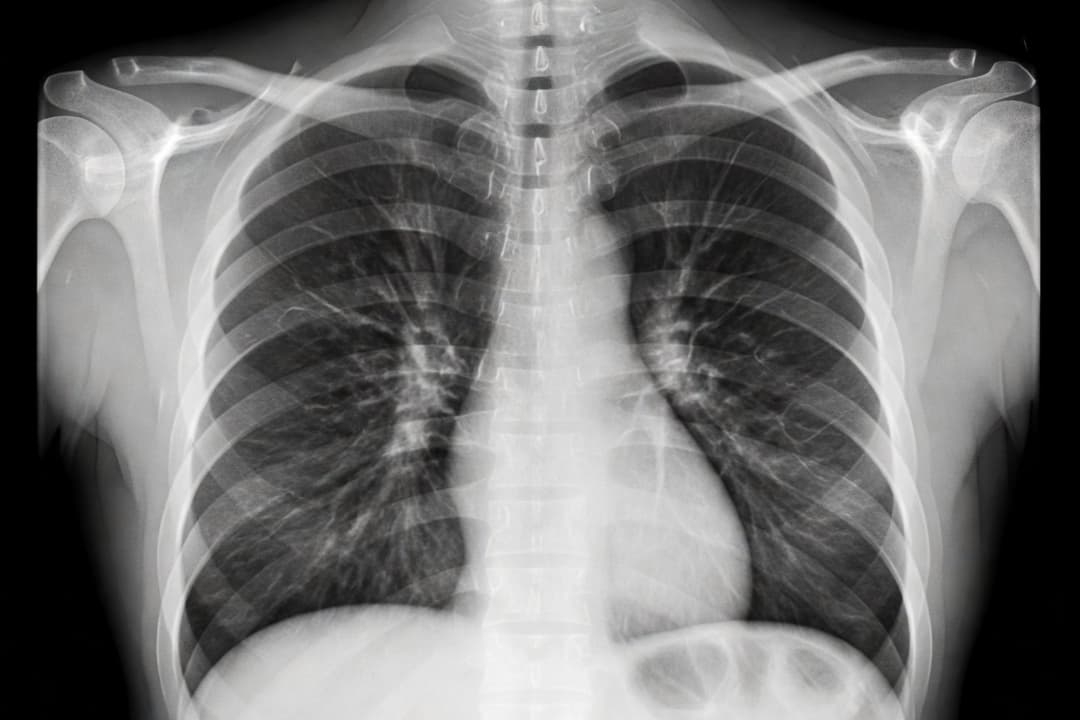
ThoraxScan is an educational LMS for Radiologic Technology students. Practice chest X-ray interpretation through professor-guided activities, with AI-powered finding heatmaps after submission.
Every activity follows the same four steps. You commit to your own reading first; the AI and your professor respond after. AI feedback supports learning and never replaces a diagnosis.
1
Interpret first
Study the case, select every finding you see from the 14 labels, explain each one, and mark where it is.
2
Submit
Your final answer locks. It can't be edited afterwards, so the feedback always answers your own reading.
3
Review AI feedback
Unlocks only after you submit: the correct labels, validated by your professor from the AI's result, and your heatmap side by side with theirs.
4
Faculty evaluation
Your professor reviews your labels, answers and heatmap and gives the grade that counts.
One platform, two roles
Professors run the classes; students practice and learn inside them.
For Students
Join your class workspace with an invitation code from your professor.
Complete activities and see the validated answer and your score once you submit.
Practice anytime in Learning Mode with the built-in X-ray library; practice results stay in your browser.
Learn what finding heatmaps can and can't tell you.
For Professors
Apply for a professor account; an administrator approves it.
Create workspaces and invitation codes for your classes.
Publish activities from your own X-rays or the built-in library.
Review submissions and evaluate each student's reading.
Under the hood
0.880mean AUC across the five CheXpert competition labels
Release v7, measured on the 234-image CheXpert validation set, which the model was neither trained nor tuned on.
TinyViT-11M, a hybrid vision transformer pretrained on ImageNet-22k and distilled from a FastViT teacher.
Trained on CheXpert frontal and lateral chest X-rays plus NIH ChestX-ray14 to score 14 findings.
Runs in your browser with ONNX Runtime Web: WebGPU where available, WebAssembly otherwise.
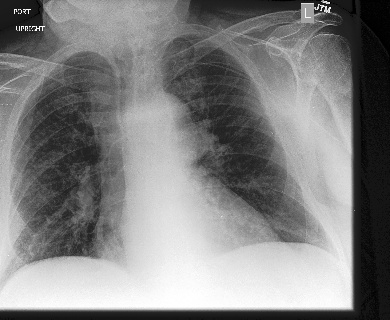
Finding heatmaps are class activation maps: one 14×14 map per finding, showing where the evidence for that finding sits. They guide the eye; they don't outline lesions.
This class activation map shows where the model's evidence for Edema is strongest in this image. Warmer colors (red) mark more evidence relative to the rest of this image; cooler colors (blue) mark little or none. It is a coarse 14×14 guide for where to look, not a lesion outline, a measurement, or a diagnosis.
Less evidence for Edema → More evidence for Edema
Method and 14×14 data
Class activation map (CAM): the classifier's weights for this finding applied to the final feature map, negative evidence clipped to zero, then scaled so this finding's strongest cell is 1. The values are relative evidence within this image, not probabilities. A strong map does not mean the finding is present; check the finding's probability for that. The overlay is smoothed between cell centers for display; the underlying data is still this 14×14 grid.
Normalized Edema evidence, rows top to bottom and columns left to right
Row
1
2
3
4
5
6
7
8
9
10
11
12
13
14
1
0.20
0.19
0.16
0.16
0.19
0.20
0.20
0.18
0.16
0.15
0.15
0.14
0.14
0.13
2
0.20
0.20
0.19
0.20
0.24
0.24
0.22
0.20
0.18
0.17
0.15
0.15
0.14
0.14
3
0.21
0.22
0.24
0.28
0.34
0.33
0.27
0.23
0.21
0.19
0.16
0.15
0.16
0.17
4
0.23
0.28
0.38
0.41
0.40
0.37
0.33
0.31
0.32
0.28
0.20
0.16
0.17
0.17
5
0.27
0.38
0.59
0.61
0.41
0.34
0.39
0.44
0.49
0.43
0.28
0.19
0.17
0.16
6
0.34
0.49
0.80
0.79
0.46
0.33
0.42
0.50
0.57
0.51
0.31
0.20
0.17
0.16
7
0.44
0.63
1.00
0.96
0.52
0.34
0.43
0.50
0.57
0.50
0.30
0.19
0.18
0.17
8
0.44
0.62
0.99
0.97
0.54
0.38
0.47
0.52
0.54
0.45
0.25
0.16
0.17
0.18
9
0.32
0.48
0.79
0.80
0.51
0.43
0.55
0.56
0.48
0.35
0.18
0.12
0.16
0.19
10
0.25
0.37
0.61
0.65
0.49
0.47
0.58
0.56
0.43
0.30
0.16
0.12
0.17
0.19
11
0.22
0.30
0.45
0.51
0.48
0.50
0.56
0.53
0.39
0.28
0.19
0.15
0.18
0.19
12
0.20
0.24
0.32
0.38
0.41
0.44
0.47
0.43
0.33
0.24
0.19
0.17
0.19
0.19
13
0.18
0.19
0.21
0.24
0.27
0.29
0.30
0.28
0.24
0.20
0.17
0.16
0.19
0.20
14
0.17
0.16
0.16
0.17
0.20
0.21
0.21
0.20
0.20
0.18
0.16
0.16
0.19
0.20
How ThoraxScan is built
The technical overview: architecture, modules, model details, stack, security, and where the build stands.
System architecture
A browser-inference learning platform with a supporting backend: the server keeps the records and the rules, and the browser runs the model.
01BrowserNext.js 16 · React 19 · Tailwind CSS 4
02ServerServer Components · Server Actions · Supabase SSR sessions
04StoragePrivate activity cases · content-addressed model artifacts
05In-browser AIONNX Runtime Web · WebGPU, WebAssembly fallback
Inference runs in the browser
The browser downloads the active model, verifies its bytes, preprocesses the X-ray and runs it with ONNX Runtime Web. The server stores results; it never runs the model.
The database enforces the rules
Row-level security, lifecycle triggers and immutable rows live in Postgres, so the rules hold whichever page or request touches the data.
Models change without a redeploy
A new model is validated, registered as an immutable release, then activated by moving one database pointer. Rollback moves it back, and past analyses keep the model that produced them.
Features, grouped by module
Accounts and access
Student or Professor registration with email confirmation
Cloudflare Turnstile on sign-up, login and password recovery
Professor accounts approved by an administrator
Settings: theme, text size, high contrast, sign-in email
Workspaces
Professor-owned class workspaces
Expiring, use-limited invitation codes for students and co-professors
Membership-scoped access to every activity and case
Activities
Draft → published → archived lifecycle
One X-ray case per activity: JPEG or PNG upload, or a pick from the built-in library
AI analysis on the draft, validated by the Professor into an answer key of labels and heatmaps
Optional due dates and a notification bell
Submissions and feedback
Drafts, then one immutable final answer: labels from the 14, optional written answers per label, and a heatmap per finding
The validated answer key, with the student's heatmap side by side, released only after submission
Faculty evaluation with a grade and feedback, released explicitly
Learning Mode
Practice on a 234-image CheXpert library or your own image
Likely and possible findings across all 14 labels
Finding heatmaps and a printable heatmap guide
Practice results stay in browser memory
Private notes on library cases, visible only to you
Administration
Review Professor applications
Grant and revoke administrator access; the last administrator can't remove themselves
TinyViT-11M, a hybrid vision transformer (convolution stage, then attention stages) pretrained on ImageNet-22k and distilled from a FastViT-SA12 teacher.
Training data
CheXpert v1.0 (frontal and lateral views) plus the NIH ChestX-ray14 training split (frontal). Labels NIH does not report are left out of the loss for its images. Checkpoint and thresholds are chosen on a held-out patient split, so the 234-image official validation set stays unseen.
Input
Grayscale. Full-size uploads are first shrunk to a 320-pixel short side, the way the CheXpert-small training images were made; then every image is resized to 224×224 and normalized. Built-in library images are already at that size, so their results are unchanged.
Thresholds
Per-label F1 on the held-out split. Cardiomegaly is lowered to reach 80% held-out sensitivity. A "possible" tier flags the five competition labels at 85% sensitivity. Enlarged Cardiomediastinum is also flagged whenever Cardiomegaly is, following CheXpert's label hierarchy, and then shows the Cardiomegaly heatmap.
Explainability
Class activation maps: the classifier's weights for each finding applied to the final 7×7 feature map (with the head's normalization), smoothed to 14×14, clipped at zero and scaled per finding. Exact for this architecture and computed in the same forward pass. A guide to where the evidence is, not a lesion outline.
Limits
Learning Mode accepts frontal and lateral images; activities accept frontal only. Lateral held-out competition AUC is 0.82 (frontal 0.80), but lateral mean AUC is lower (0.77 vs 0.81). Cardiomegaly sensitivity is 0.47 on the official set even after tuning. Not clinically validated.
What it’s built with
Frontend
Next.js 16 (App Router)
React 19
Tailwind CSS 4
TypeScript 5
Data and auth
Supabase Auth
Postgres with row-level security
Supabase Storage
sharp for server-side image checks
In-browser AI
ONNX Runtime Web 1.27
WebGPU, with a WebAssembly fallback
Content-addressed model files
Model training
Python 3.14 and PyTorch with CUDA 12.8
timm vision models
ONNX export (opset 17)
ONNX Runtime GPU parity checks
Hardware
NVIDIA GPU workstation for training and export
The user's own device runs the model
Vercel and Supabase cloud servers
Operations
Cloudflare Turnstile
Vercel Analytics and Speed Insights
Vitest unit and Playwright browser tests
pgTAP database tests
Designed with security in mind
Row-level security
Every table is guarded in Postgres. Students read only their own work; Professors read only final submissions in their workspaces.
Answers stay private
Answer keys live in a separate table that students cannot read; they receive the key only after their own final submission.
Private case images
Images upload straight to a private bucket with a signed token. The server then re-checks type, size and that the file actually decodes.
Hashed invitations
Codes are 128-bit, expiring and use-limited. Only SHA-256 hashes are stored, and redemption locks the row so caps hold under load.
Immutable records
Final submissions, released AI feedback, released evaluations, model releases and published cases can't be edited or deleted.
Verified models
Model files are content-addressed and checked before they run. If the active release changes mid-session, the runtime fails closed rather than using a stale model.
Hardened sign-in
CAPTCHA on every auth form, email confirmation, passwords with at least 8 characters including a letter and a number, and safe-only redirects.
Separate admin capability
Administrator access is its own record, not a role, re-checked on every admin page, with no self-service way to obtain it.
Where the build stands
Implemented
Accounts, roles, Professor approval and administrator management
Workspaces, invitation codes and membership
Activities with private cases and Professor-validated answer keys
Draft and final submissions
In-browser AI analysis with finding heatmaps, released after submission
Faculty evaluation and notifications
Class analytics with CSV export
Learning Mode with the built-in X-ray library, frontal and lateral, and private case notes
Model registry with validation, staging, activation and rollback
Privacy notice consent recording and accessibility settings
Continuing or under evaluation
Network testing to confirm what the browser inference path sends and keeps
Lateral views for activities
Legal and institutional review of the privacy policy and terms
Separate research evaluation, such as a usability questionnaire, with its own consent
An academic project
ThoraxScan is a capstone prototype for Radiologic Technology education. It is evaluated on functionality, integration and the model figures above. Clinical validation and production-grade deployment are outside its scope.
Capstone project
Radiologic Technology
Chest X-ray
Vision transformer
In-browser AI
Learning management
Documentation
How to use ThoraxScan as a student or professor, and how to set it up, run it and ship models as a developer. Each topic names the repository files it’s drawn from.
Using ThoraxScan
Create an accountRegister as a Student or a Professor.
Open Create an account and choose Student or Professor.
Enter your name, email and a password of at least 8 characters with at least one letter and one number. Agree to the Terms, acknowledge the Privacy Policy, and complete the security check.
Confirm your email from the link ThoraxScan sends you.
Professors: your account starts as a pending application. An administrator approves or rejects it; until then you see its status instead of the Professor dashboard.
Join a classStudents join a workspace with an invitation code.
Your professor gives you a 22-character invitation code. Enter it on your dashboard to join their workspace. Codes can expire and have a use limit; joining twice doesn’t use the code again.
Professors can remove students from a workspace. Co-professors can leave on their own; the owner can’t.
Complete an activityInterpret the case, save drafts, then submit once.
Open a published activity from your workspace. You see the instructions, the due date and the X-ray.
Tick every finding you see from the 14 labels. Choose No Finding on its own for a normal X-ray.
Optionally explain each label in writing, then mark where each finding is: pick it and drag over the X-ray. The brush has an adjustable size, strength and hardness, and strokes can be undone. Every finding needs a marked area before you can submit.
Save a draft as often as you like. Drafts are private.
Submit when you’re sure. You confirm first, and the final answer can’t be changed. A draft left past the due date stays unsubmitted.
Read your feedbackYour results after you submit, then your professor's evaluation.
Results appear only after your final submission. They show the correct labels, which your professor validated starting from the AI’s result, which ones you selected, missed or added wrongly, and your written answers.
Pick a finding to see your heatmap next to the validated one: the AI’s map, corrected by your professor where needed. The heatmaps don’t outline a lesion or confirm a diagnosis.
Faculty evaluation shows your professor’s grade and feedback once it is released. Until then the activity shows as awaiting review.
Practice in Learning ModeRun the model on any X-ray; results aren't saved.
Open Learning mode from the sidebar (Students and Professors).
Pick an image from the built-in CheXpert library, or choose your own JPEG or PNG, frontal or lateral.
Select Analyze. The model runs in your browser and shows findings, every label, and a heatmap for each likely or possible finding. An image that doesn’t look like a chest X-ray is refused and not analyzed.
Results aren’t saved: no submission, no upload, no stored result. Reset clears them.
On a library case you can keep a private note for your own review. Notes are saved to your account and nobody else can see them.
Publish an activityProfessors: draft, attach an X-ray, validate the AI result, publish.
Create a draft with a title, instructions and an optional due date.
Attach one frontal chest X-ray: upload a JPEG or PNG, or pick one from the built-in library. Images that aren’t chest X-rays, or that look like lateral views, are rejected.
The AI reads the case in your browser as soon as it is attached. Keep the page open while it runs.
Validate the AI result: tick the labels that are truly present, adding what the AI missed, and paint over each finding’s heatmap to correct it with an adjustable brush (size, strength, hardness, undo). Save the answer key.
Publish. A published activity’s case and answer key can’t be changed; archiving is final.
Review, evaluate and trackProfessors: grade submissions and follow the class.
The review queue lists final submissions, including those in archived activities.
Each submission shows the student’s labels and written answers against your answer key, and their heatmap next to yours. Nothing is scored automatically: save a private draft evaluation, then release it with your grade and feedback. Released evaluations can’t be changed, and students never see your remarks.
Analytics shows each workspace’s on-time, late and missing work, released-score averages, the review backlog, and how often students agree with the AI’s normal/abnormal call. Export the per-student table as CSV.
Settings and accessibilityProfile, sign-in email, password, text size and contrast.
Profile: display name, plus an optional work phone for Professors.
Security: change your sign-in email (confirmed from both addresses) or your password.
Two-step login (optional, under Security): scan the QR code with an authenticator app, then enter a 6-digit code after your password each time you log in. Turning it off asks for your password. If you lose your phone, an administrator can reset it.
Accessibility: larger text and high contrast, saved in this browser. The theme button switches light and dark.
How data flowsTwo paths: learning records on the server, inference in the browser.
Learning records: browser → Next.js Server Components and Server Actions → Supabase Auth (cookie sessions), Postgres (row-level security, RPCs, triggers) and Storage (private cases behind short-lived signed URLs).
Inference: the browser asks for the active release, downloads and verifies the model, preprocesses the image and runs ONNX Runtime Web (WebGPU, falling back to WebAssembly).
Activity results (14 probabilities, the heatmaps and provenance) are saved once through an authorized RPC; Learning Mode results stay in memory.
Copy .env.example to .env.local and set NEXT_PUBLIC_SUPABASE_URL, NEXT_PUBLIC_SUPABASE_PUBLISHABLE_KEY, NEXT_PUBLIC_SITE_URL and NEXT_PUBLIC_TURNSTILE_SITE_KEY. Locally, use Cloudflare’s always-pass Turnstile test keys, with the matching secret as SUPABASE_AUTH_CAPTCHA_SECRET in the root .env. Never use test keys in production.
Running and testingDev server, unit, browser-model and database tests.
npm run dev                 # prepares ONNX Runtime assets, then next dev
npm test                    # Vitest unit tests
npm run test:model:browser  # Vitest in Playwright Chromium
npm run lint
npm run build
Database behavior is covered by pgTAP tests in supabase/tests/database.
Model releasesValidate, stage, activate and roll back without redeploying.
Releases are immutable and content-addressed. A bundle under the ignored model-input/<release-id>/ holds model.onnx, release.json, thresholds.json, an optional possible-thresholds.json, a preprocessing reference and test fixtures.
npm run model:validate   # checksums, shapes, determinism, WASM and WebGPU parity
npm run model:stage      # upload as an inactive release
npm run model:status
npm run model:activate   # compare-and-swap the active pointer
npm run model:rollback
Contract v2 adds a global [batch, 1, 7, 7] attention map; contract v3 replaces it with per-finding class activation maps, [batch, 14, 14, 14].
A release picks its resize: straight to 224, or shortside320-bilinear-center, which first shrinks images with a short side over 320 to 320, the way CheXpert-small was made.
Weights and thresholds can change without a deploy while the contract and resize mode stay the same. A release that needs a newer contract or resize mode only runs on an app built to accept it, so deploy first.
Validate locally first. Publisher service-role keys belong only in the operator environment, never in Vercel.
AdministratorsBootstrap the first one, then manage the rest in the app.
Administrator is a separate capability, not a registration role.
An operator adds the first administrator once, directly in the database, after that person has registered and confirmed their email.
From then on, administrators add or remove others in the Administrators section of /admin. Nobody can remove themselves, so one always remains.
Administrators log in as the Student or Professor they are, then open Administration in the sidebar. The console’s My dashboard link goes back.
The console at /admin also reviews Professor applications, manages accounts (rename, temporary password, sign out, reset two-step login, disable, delete), posts site-wide notices, and shows platform statistics, an activity feed and a Professor report (CSV). Every administrator action is logged.
DeploymentVercel Production on the hosted Supabase project.
Vercel Production points only at the hosted Supabase project, using its public URL and publishable key. There is no separate preview or staging database.
Deploy the CAPTCHA-aware app before turning on CAPTCHA in hosted Supabase. To roll back, turn CAPTCHA off first.
Before a production migration: run a linked dry run, review the Supabase Security and Performance Advisors, and take a backup.
Rolling out a model that needs app changes goes in this order: apply the migration, deploy the app, model:stage, check model:status, then model:activate. Activating before the deploy breaks inference until the deploy lands.